Showing posts with label My Craft Spot stamp. Show all posts

Sunday, August 23, 2015

Cheers!


This week my daughters dad had a birthday and I created this shape card for him. I originally wanted to make the beer part of this card a dark beer but I wasn't happy with any of the color choices of cardstock I had. I did have this fabulous Gold cardstock from Recollections, so I went with that. I used a very pale grey cardstock for the mug and a vanilla cardstock for the beer foam.


I used 2 appropriate clear stamp sentiments inside and of course we all signed it. My youngest daughter just entered Kindergarten and is learning to write her name, I think she did very well.


The above picture is the back side of the card...I thought it would it a more realistic look. Oh and the other thing I did to the original image was use the flip feature on my Cricut Expression because he's left handed.


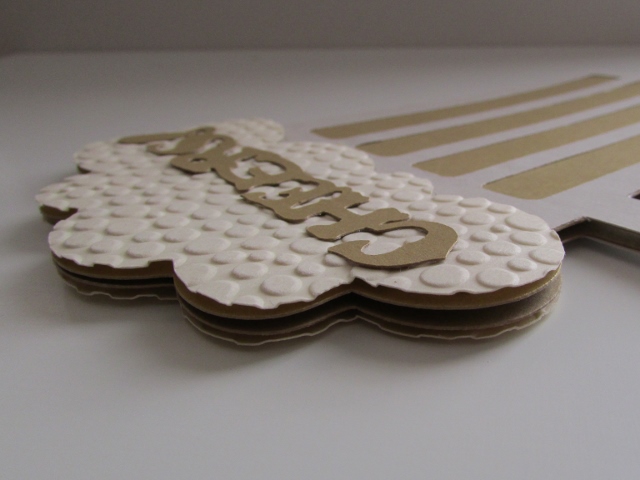
Just to give the card a little dimension I used an embossing folder on the beer foam and added adhesive foam mounts to the back.
 
 
I used these items to create my Cheers! card:
  • Everyday Pop-Up cards Cricut cartridge - beer mug and CHEERS!
  • Gold, grey and vanilla cardstock
  • Cardz TV Stamps "Good Times" - Here's to You!
  • My Craft Spot - Inside & Out - Set #2 stamp set - Happy Birthday
  • Cricut embossing folder - Tiny Bubbles - on the beer foam
 
I am entering my Cheers! card in the following challenges:

Thank you so much for stopping by and checking out my Cheers! card. I hope you enjoyed it and I look forward to your next visit.

Monday, June 22, 2015

Fantabulous Cricut Challenge # 254 - Anything Goes

Welcome to another Challenge Me Monday


Challenge #254 Anything Goes

This Weeks Sponsor

 Winner will receive a $25.00 Gift Certificate to Verve Stamps
 
For my Anything Goes project I created a
coordinating scrapbook layout and card for my
Mom's 72nd birthday...and yes the photo is of my mom
when she was only 20 months old.


This is the first time I created a layout, or anything for that matter, vintage and/or shabby chic...it was way out of my comfort zone. I felt that this type of layout is what the picture needed so I had to try it...I think I did ok.


Here I created a little hidden journaling tag.

 
Once the layout was finished I knew I wanted to create a coordinating card.
Thankfully I had enough paper in the DCWV The French Country Stack to do so.


I used these items to create my Once Upon a Time coordinating scrapbook layout and card:
  • DCWV The French Country Stack - paper
  • Storybook Cricut cartridge - Once Upon a Time on layout
  • Fabulous Finds Cricut cartridge - hidden tag on layout
  • Ultimate Creative Series Sampler Cricut cartridge - butterfly, bird and cage
  • misc. paper flowers
  • Lace doily - from my stash
  • ribbon - from my stash
  • misc, chipboard - Sweet on layout 
  • My Craft Spot (sorry closed) - Inside & Out - Set #2 clear stamps - Happy Birthday on card
  • My Craft Spot (sorry closed) - Jar Full of Flowers clear stamps - butterfly stamp on card
  • White Enamel Accents - on card
I am entering my Once Upon a Time coordinating scrapbook layout and card in the following challenges:
Thank you so much for stopping by and checking out my Once Upon a Time coordinating scrapbook layout and card. Please head over to Fantabulous Cricut Challenge Blogspot and enter your own Anything Goes Cricut project.


post signature

Tuesday, May 5, 2015

Mother's Day 3-D Tea Cup and Tea Cup Card


I am super excited to share with you my Mother's Day 3-D Tea Cup and Tea Cup Card. I made these for my mom for Mother's Day. My mom loves strawberries and her kitchen is packed with strawberry décor. Recently my mom had decided to stop drinking coffee and start drinking tea, so I decided that would be my theme for Mother's Day for her. I already this fantastic paper from the Martha Stewart essentials paper pad that I knew would be perfect. Since I had a great experience when using the Tags, Bags, Boxes and More 2 Cricut cartridge I decided to try to make the 3-D tea cup...it was super easy.

I cut the 3-D tea cup from the Tags, Bags, Boxes and More 2 Cricut cartridge using the fit to page feature on my Cricut Expression. I cut the entire cup from one 12 x 12 sheet of thick double sided paper. I lined the edge of the cup and saucer with a silver paint marker. Then adhered them all together. I think it turned out so cute!


I was able to fit 8 individual tea bags in the cup


Then I decided to make a coordinating card and envelop to go along with the tea cup. I cut and adhered the envelop for the doily card out from the Wild Card Cricut cartridge, again using the fit to page feature. The size ended up being 5 inches so I now knew that I needed to cut the card at 5 inches, too. I cut the liner out at 4 1/4 and also used the inside of that liner, flipped it, embossed it and adhered everything to the front of the card. I then went back to the Tags, Bags, Boxes and More 2 Cricut cartridge and cut the tag feature out for the tea cup (can't remember size). I then stamped the front of the of the tea cup with "mom." I lined the edge of the tea cup with the silver paint marker. Then I adhered the tea cup to the front of the card with foam squares. I then cut a circle out for the inside, adhered it and just stamped it with "Happy Mother's Day." Lastly, I tied a green ribbon (from my stash) around the top of the card and done!


I used these items to create my Mother's Day 3-D Tea Cup and Tea Cup Card:
  • Tags, Bags, Boxes and More 2 Cricut cartridge - 3-D tea cup and tea cup on card
  • Wild Card Cricut cartridge - card and envelop
  • Martha Stewart essentials paper pad - 1st time I used it and I've had it for years 
  • Silver paint marker
  • Swiss Dots embossing folder - card
  • My Craft Spot clear stamp set "Jar Full of Flowers" - sentiment
  • green ribbon (from my stash)
I am entering my Mother's Day 3-D Tea Cup and Tea Cup Card in the following challenges:
I had so much fun creating these Mother's Day 3-D Tea Cup and Tea Cup Card. I can't wait to give them to my mom...I know she is going to love them. Thanks for stopping by and checking out my projects. Happy "early" Mother's Day to all of you Moms, Grandmas, and Great-Grandmas!

Saturday, January 31, 2015

Pooh Angel card

 
I am sharing with you today a special card I made for a very dear friend. In July of last year my friend announced that she was pregnant with her 3rd child.  I was so excited for her to be pregnant. I wanted to help in any way, so I had asked if she had any ideas of what theme, if any, she was thinking of for the baby. She was going to go with a Pooh theme. Her other children were associated with Piglet and Tigger so Pooh was next. We were sharing pictures back and forth of Pooh bedding...then she chose one and bought it. Then just days after her 10 week check up she sadly miscarried the baby. She has since been dealing with the loss of what she thought was a baby girl.
 
Since I too know what it is like to loss a baby, one due to a complete placental abruption and another baby to a miscarriage...I also know what it is like when birthdays, due dates, holidays, anniversaries and any other special day associated to that child comes around. As a bereaved parent you don't want others to forget about your baby. So I am taking this opportunity to let me dear friend know that on her baby's due date I am thinking of her.  
 
Here you can see I also made an envelop for the card...both of which are 4 1/4 inches square.
 
 
This image of Pooh sleeping on a cloud shows the embossing and stickles I added to the clouds and wings.


The next 2 images show the dimension I added with some foam squares.


 I am so pleased with the way this very special card turned out and I know my friend will love it.
 

I used these items to create my Pooh Angel card:
  • ZooBalloo Cricut cartridge - the card, the envelop and the 2 clouds
  • Pooh Font Cricut cartridge - Pooh
  • Pink Journey Cricut cartridge (1st time I used this cartridge) - the 2 wings
  • My Craft Spot clear stamps - Jar Full of Flowers - "thinking of you"
  • Silver pen - faux stitching around card
  • Stickle - the clouds, and wings
I am entering my Pooh Angel card in the following challenges:
Thank you so much for stopping by and checking out my Pooh Angel card. And remember, if you know someone who has had a miscarriage or lost a child please take the time out to remember that child...it really does mean a lot.

Tuesday, September 30, 2014

Elmo Crayon Box


So there is a sweet little boy who just turned 2 and I wanted to make something special for him. Since we were only giving him some toys my youngest daughter was donating to him and some money, it had to be something different. I was going to make a pop-up box card but I thought, I already did that earlier in the year for his sister. I knew he liked Elmo so I flipped through some of my Sesame Street and Elmo Cricut cartridges and found alot of things I liked. I decided that the size of the crayon box on the Elmo's Party Cricut cartridge was perfect to not only hold a box of crayons but the money too and that is what I decided to do.


I used these items to create my Elmo Crayon Box:

  • Elmo's Party Cricut cartridge - Elmo crayon box cut @ 8 inches and all layers
  • Martha Stewart red (ladybug) flocking powder - on Elmo's face 
  • Glossy accents - on the crayons
  • Black pen - on the crayons
  • My Craft Spot clear stamp set - In & Out Set #2 - Happy Birthday and back sentiment
  • black and white ink


I am entering my Elmo Crayon Box in the following challenges:

This was such a fun and easy project. Thank you so much for checking out my Elmo Crayon Box.

Monday, September 22, 2014

My Craft Spot Challenge #152 - Blast From the Past

This is an interesting challenge coming to you from My Craft Spot Challenge #152 - Blast From the Past - You are to pick a favorite project you have created some time in the past using My Craft Spot Products. I choose my Tulip Happy Birthday Pop Up Box Card


I used the My Craft Spot Clear Stamps Inside & Out Set 2 for the front and the back of this card. I love the way this card turned out and my mom still has it sitting on her table 3 months after her birthday.

Wednesday, June 18, 2014

Tulip Happy Birthday Pop Up Box Card


This past Sunday was my Mom's birthday and I made this Tulip Happy Birthday Pop Up Box Card for her. I had to get my creative thinking on to make this card.  I knew right away I wanted to have tulips because they are one of my mom's favorite flowers. I also knew I wanted to make a pop up box card because I like that they can serve double duty as a card and decoration. Believe it or not, out of all of the Cricut cartridges I have there was not one single tulip flower I liked so I had to create my own. I looked through images on Google of tulips to get the general shape. I noticed the shape was kind of like an egg so I decided I was going to cut 3 egg shapes and layer them and OMG...it worked! I then needed to find a stem and leaves I liked. I found that some blades of grass would work for that effect. Now I absolutely had to use purple because it is mine and my mom's favorite color. Lastly, it was about getting it all cut out and put together. I am so pleased with the way this card turned out and so was my mom.

I used these items to create my Tulip Happy Birthday Pop Up Box Card:
  • Doodlecharms Cricut cartridge - to create the tulips with the egg shape
  • Create a Critter Cricut cartridge - to create the stem and leaves with the blades of grass
  • white ink - to highlight the tulips
  • purple ink - Happy Birthday and sentiment on back of card
  • My Craft Spot - Inside & Out - Set #2 clear stamp set - for the Happy Birthday and sentiment on back of card 
  • Stampin' Up! 4 rhinestones - on front of card
  • Mart
  • 2 shades of purple cardstock
  • white and green cardstock
  • 2 different pattern papers
  • Martha Stewart corner punch - Deco fan
Here are some close ups of the flowers and the back of the card:


I am entering this card in the following linky parties and challenges:
Thank you so much for stopping by and checking out my Tulip Happy Birthday Pop Up Box Card.

Friday, February 28, 2014

Happy Birthday Pop Up Box Card


My oldest daughter is turning 12 next month so of course I had to make a card. Recently I have seen these amazing Pop Up Box Cards and I just had to try it. I think I did ok for my 1st try.

Here are some close ups:


This is how it looks when it is closed and folded to fit in a envelop:


This is how it looks when opened:


This is the backside:


I used these items to create my pop up box card:
  • Tutorial from Splitcoast Stampers
  • Color Bok Day Glo cardstock
  • black and white cardstock
  • misc. pattern paper I've had forever
  • Birthday Cakes Cricut cartridge - balloons, Happy Birthday and presents
  • Celebrations Cricut cartridge - 12
  • Glossy Accents - on balloons
  • Stickles - on Happy Birthday, presents and 12
  • Cricut Embossing folders: Tiny Bubbles and Spot/Dots - on presents
  • My Craft Spot - Inside & Out - Set 2 stamps - the backside sentiment
I am entering my pop up box card in the following challenges and linky parties:
Thank you so much for stopping by and checking out my Pop Up Box Card.

Thursday, November 7, 2013

Simple Baby Shower card


Here is just a simple baby shower card I made using the Wrap It Up Cricut cartridge card feature of the onesie. I cut the card at 5 1/4 out of the purple cardstock so that it would fit in a 5 1/2 square envelop. I then cut the inside circles from the flower pattern paper and lavender cardstock. I adhered them to the card. I used a white gel pen to just dot the outside of the card. I then stamped the inside sentiment from  My Craft Spot - Clear Stamps - Inside & Out - set #2. Lastly I tied a white ribbon around the fold in the card.
 
 
Here's a look at the inside:


This was a super simple and really quick baby shower card.

I am entering this card in the following challenges:
Thank you so much for stopping by and checking out my simple baby shower card.

Saturday, March 16, 2013

Camouflage Onesie Shape card


Last month one of my nieces had an emergency C-section and gave birth to a baby boy 11 weeks early. Baby is currantly still in the NICU but progressing very well and Mom is recovering very well also.  I knew about 2 months ago or so that the baby's bedding was going to be camouflage so I knew that when the time came I was going to use that for whatever creation I was going to make. Since the baby came early I have only been able to make a card and this is it. I totally love the way it turned out and can't wait to get involved in more baby projects using the camouflage. This is only the beginning.

Here you can see where I welded the onesie together in the Design Studio:


Here is just a close up of the inside where I did some faux stitching and stamped my sentiment:


I used these items to create my Camouflage Onesie Shape card:
  • Design Studio - to weld the onesie together
  • New Arrival Cricut cartridge - onesie
  • Pooh Font Cricut cartridge - "100 % Boy"
  • buttons
  • My Craft Spot Clear Stamps - In and Out - Set #2 - the inside sentiment
  • Baby wooden stamp - on the inside
  • green gel pen - faux stitching - on the inside
I am entering this shape card in the following challenges and linky party:
This was such a fun and easy card to make. Thank you for stopping by and checking out my Camouflauge Onesie Shape card.

Friday, March 15, 2013

Rainbow Birthday card


Today I give you my Rainbow Birthday card. A friend of mine's daughter is turning 2 this weekend and she had requested that I do a card for her like I had done for her son when he was born (SEEN HERE). Also she wanted me to incorporate her daughter's new toddler bedding SEEN HERE! I think I captured what she wanted...I am so happy with the way it turned out. What do you think?


Here you can see the dimension:
 
 
Here is the inside:


I used these items to create this Rainbow Birthday card:
  • Create a Critter 2 Cricut cartridge - rainbow and clouds
  • Celebrations Cricut cartridge - orange flower
  • Accent Essentials Cricut cartridge - pink flower
  • Pooh Font Cricut cartridge - Rosannah and 2 (on inside)
  • teal blue pen - faux stitching on pink flower
  • Stickles - clouds
  • buttons - on flowers
  • Recollections foam squares
  • My Craft Spot - Clear Stamps - sentiment on the inside of card

I am entering my Rainbow Birthday card in the following challenges and linky party:
Thank you for stopping by and checking out my Rainbow Birthday card, I hope you liked it!