Showing posts with label George and Basic Shapes. Show all posts

Monday, August 21, 2017

Fantabulous Cricut Challenge # 308 - Vacations

 Happy Monday and welcome to another Monday challenge!


Challenge #308-Vacation
Make a project about vacation!

The FCCB Design Team is sponsoring a $25 gift card at

Amazon!

To qualify for the prize, be sure to use at least 1 Cricut cut on your project and if it's not obvious, let us know what cartridge you used. If you use a Cricut Explore machine, at least one cut must be from the Cricut catalog of images.

If it isn't a card, you will get two entries into the drawing!

Here's my Project:


My ex got a motorcycle a year or so ago. His birthday was this past Saturday so I made him this birthday card that looks very similar to his motorcycle. I know it doesn't quite represent a vacation but it could in the future.
 
I used these items to create my motorcycle card:
  • Father's Day Cricut cartridge - motorcycle
  • George and Basic Shapes Cricut cartridge - rectangle for sentiment
  • Black, white and red cardstock
  • 2 types of foil paper
  • brads
  • Glossy Accents
  • Black ink
 
I am entering my motorcycle card in the following challenges:
 
Thank you so much for stopping by and checking out my vacation project. Make sure to go to Fantabulous Cricut Challange Blog and enter your vacation project.


Monday, June 26, 2017

Fantabulous Cricut Challenge # 304 - Patriotism

 Happy Monday and welcome to another Monday challenge!

******* (Opps I missed my scheduled post) *******

Today is actually Tuesday afternoon and this my DT post for Monday's challenge
over at
Fantabulous Cricut


Challenge #304-Patriotism
Make a project about patriotism in any country!

This Weeks Sponsor


Dreaming Tree SVG's

The winner will receive a $20 Gift Certificate!

To qualify for the prize, be sure to use at least 1 Cricut cut on your project and if it's not obvious, let us know what cartridge you used. If you use a Cricut Explore machine, at least one cut must be from the Cricut catalog of images.

If it isn't a card, you will get two entries into the drawing!

Here is my Project
 
 
I created this décor piece for Independence Day aka the 4th of July
The piece is a standard 12 x 12 with 9 3 1/4 inch squares decorated with
Independence Day related images.
All images are raised with foam tape for some extra dimension.
 
Here are a few close ups of some of the images:


I used these items to create my Independence Day décor piece:
  • Ultimate Creative Series Sampler Cricut cartridge - United States, hat, fireworks, flag, Liberty bell, firecracker
  • George and Basic Shapes Cricut cartridge: Star
  • Old West Cricut cartridge: Bunting
  • Phrases Cricut cartridge: 4th of July
  • foam tape: under all images
  • Silver Stickles: firecracker
  • Martha Stewart glitter (red and silver): fireworks
I am entering my Independence Day décor piece in the following challenge:
 
I had so much fun creating this Independence Day décor piece. Thank you for stopping by. Please head over to Fantabulous Cricut Challenge Blog and add your Patriotic project.

Thursday, February 12, 2015

Owl be Yours Pop Up Box card


This morning I bring to you a cute little pop-up box card I made for my mother-in-law from my girls for Valentine's day. My mother-in-law loves owls so I knew I just had to use the Create a Critter 2 Cricut cartridge for this darling owl.


Here's a look at the front again and the back:


I used these items to create my Owl be Yours Pop Up Box card:
  • Create a Critter 2 Cricut cartridge - owl, "Owl be Yours", cupcake, and "Love"
  • Elegant Edges Cricut cartridge - heart border
  • George and Basic Shapes - hearts on the sides and back
  • Red stickels
  • Pink brads - on the cupcake
  • White gel pen - on the cupcake
I will be entering my Owl be Yours Pop Up Box card in the following challenges:

Thursday, June 19, 2014

Wedding Tag


I don't normally do tags, I don't know why but I had a reason this time...my niece is getting married next year. Based on what I have seen her Pin on Pinterest, I believe her colors include a lavender purple. So when making this tag I new I would include lavender. Plus, there are several challenges this week that this tag will fit into.

 I used these items to create my Wedding Tag:
  • George and Basic Shapes Cricut cartridge - tag cut at 5 + the shadow in balck
  • Sweethearts Cricut cartridge - hearts cut at 1 3/4 + the shadow in black
  • Paper Dolls Dress Up Cricut cartridge - bow tie cut at 7
  • Lavender, black and white cardstock
  • ribbon
  • 3 Stampin' Up Rhinestones
  • 2 black brads
  • D'vine Swirls and Swiss Dots embossing folders
  • Inkadinkado Clear Stamp FRIENDLY ADVICE Kid Quotes - on the back of the tag
  • 1 small bell
  • 1 lavender button
  • foam squares - behind hearts
Here is a look at the back of the tag:

I am entering this tag in following challenges and linky parties:
Thank you so much for stopping by and checking out my Wedding Tag.


Friday, February 22, 2013

Another Breast Cancer Awareness Thank You card


So here is the other Breast Cancer Awareness Thank You card I made for one of my nurses who cared for me over the last 5 months during my chemo treatments. My design was inspired by the challenge over at Mojo Monday (see the sketch below). You can see the other BCA Thank You card HERE.

I tried to get a picture of this circle to show off the stickle I used around the edge of the circle and on the dots but unfortunately it didn't catch the light very well.


Here is the very simple inside...I left it this way so I could leave my own personal thank you.


I used these items to create this BCA Thank You card (ALL of which I had on hand):
  • Design Studio
  • George and Basic Shapes Cricut cartridge - circles
  • Ultimate Creative Series Cricut cartridge - Awareness Ribbon
  • White heart shape brade - on the awareness ribbon
  • ribbon - on the front and inside of card
  • Swiss dots embossing folder - on the pink circle
  • Stickles - on the pink circle
  • Misc. clear "Thank You" stamp - on the pink circle
  • Stickabilites Breast Cancer Awareness ribbon sticker - on the inside

I am entering this card in the following challenges and linky party:


Thank you so much for stopping by and checking out my BCA Thank You card.

Thursday, January 31, 2013

Wanna see something really scary?


I give you tonight a very unusual card. I'm hoping that you can figure out where my inspiration came from. If you were a lover of sci-fi movies from the 80's you probably know what it is. If you weren't, then I feel sorry for you. 

The movie is Twilight Zone:  The Movie (1983) and the last line in the movie is,"Wanna see something really scary?" by the very funny and famous Dan Aykroyd. The look on the other very famous actor, John Lithgow, is priceless!


A little background:

Four directors collaborated to remake four episodes of the popular television series 'The Twilight Zone' for this movie. The episodes are updated slightly and in color (the television show was in black-and-white), but very true to the originals, where eerie and disturbing situations gradually spin out of control.

I was only 8 years old when this film came out but I loved all things horror and sci-fi as a child and still do.

For more information go HERE!   

This is not your typical card...it doesn't really open, just the door on the front opens to reveal a surprise inside...a mirror.        

 
I thought it was appropriate to make this a birthday card...a funny ha ha Happy Birthday card! 

 
I used these items to create this card:
  • Design Studio
  • George and Basic Shapes Cricut cartridge - the card shape and rectangle cut for the mirror
  • Wild Card Cricut cartridge - the door
  • computer generated title
  • button - door knob
  • Martha Stewart glitter - around the opening of the door
  • plastic mirror sheet
 
I am entering this card in the following linky party and challenges:
Thank you so much for stopping by and checking out my birthday card, I hope you liked it and that I see you around my blog again!

Friday, January 18, 2013

Zombie Walk 2012 Layout


I am super excited to share with you today my 2 page Zombie Walk 2012 layout. I've been wanting to create this layout ever since the Zombie Walk in October.

This was the 1st year we were able to participate and I wasn't gonna let anything get in my way. The week before I had received my 2nd round of chemo to treat my breast cancer. When I had my labs drawn the next week, the week of the Zombie Walk, it was determined I was neutropenic. Which basically means all of my blood counts were extremely low or zero and that made me very susceptible to infection. So I was ordered to receive neupogen shots over the next 5 days, the last day being the night of the Zombie Walk. Plus, the doctor did want me to get a blood transfusion but I refused for personally reasons.

So the day of the Zombie Walk my husband and I were frantically trying to finish my daughter's Sam costume and I was taking my daughters across town to The Railroad Park to attend the NICU Halloween event for preemie graduates, which my youngest daughter is.  We had a really nice time. I ran into a co-worker and the family that my daughter shared a room with in the NICU. The girls got their faces painted, road the merry-go-round and the train.  Then it was rush, rush, rush home, drop the kids off and then get my last neupogen shot. Plus during all of this I was trying to find a hospital gown to wear to the Zombie Walk.  Thankfully for my nurse at the hospital, she gave me one!  Then it was a rush to get home again, still trying to finish my daughter's Sam costume and get myself and youngest daughter ready for the Zombie Walk.

We ended up just a little late and missed the beginning of the walk but joined right in. I finally felt like I belonged somewhere. Everyone was dressed in their best zombie attire. My costume consisted of a brain cap (to wear over my bald head), hospital gown, some blood splatter, and I carried around my victim (Zombie Baby). I created my Zombie Baby for the Blogger Virtual Zombie Walk 2012  (please check it out). My husband was a nerd zombie that had a pencil sticking out of his head. My oldest daughter was Sam (yes we finished it) from the movie "Trick r' Treat." You can see all of the details about Sam HERE. And my youngest was Scooby Doo.  I had the absolute best time and will never miss another Zombie Walk.

Page 1
 
Check out a close up of the brain...I am so pleased with the way it turned out!!!


Page 2
 
 
And all together

I used these items to create my layout:
  • Design Studio
  • Happy Hauntings Cricut cartridge - "Zombie Walk 2012" title, the graves and grass
  • October 31st Cricut cartridge - the hand in the title
  • George and Basic Shapes Cricut cartridge - moon
  • Paper Doll Dress Up Cricut cartridge - city
  • A Frightful Affair Cricut cartridge - the zombies and hands
  • Mini Monsters Cricut cartridge - lamp post
  • Martha Stewart Dripping Goo edge punch - blood dripping
  • Glossy Accent - on blood and shoes of business attire zombie
  • star brads
  • plastic folder divider - glass part of the lamp post
  • eyelets - lamp post sign
  • ribbon - lamp post sign
  • brown, black and white ink
  • red craft paint - on blood splattered zombie and brain
  • Brain - created by Creepy Glowbugg - I just altered it a little by adding some watered down red craft paint (it was originally gray) and glossy accent to really make it shine!
I am entering my layout in the following challenges:
I am so happy that you've taken the time to check out my Zombie Walk 2012 layout, I hope you liked it. This year I hope to be able to spend more time scrapbooking and putting together the memories that have been created over the years, especially with my girls!

Sunday, November 4, 2012

Meet Sam


Today I give you a little Halloween treat!  My husband and I created this costume and all of the props for our oldest daughter Kaitlyn.

Sam is a character from the movie "Trick 'r Treat" and he has been deemed the Halloween Mascot.  His job is to enforce the Halloween traditions; such as dressing up in costume, giving out candy and to NEVER blow out your lit carved pumpkins before midnight on Halloween.  If you don't follow these Halloween traditions Sam will find you and kill you.  You can read more about Sam: The Spirit of Halloween here.

This project was extremely difficult.  I began looking for orange footie pajamas for my daughter months ago.  With NO luck in my search, I opted to buy white footie pajamas.  My next challenge was to dye the pajamas.  Not ever dying  a single thing my entire life, I did not know that RIT dye is not recommended for 100% polyester.  Plus I didn't relize the pajamas were 100% polyester either.  So after searching the internet I did find out that there are some tricks to using the RIT dye and dying polyester. So the first orange RIT dye we tried was too light, almost a peach color. So we tried a darker RIT dye and it worked!!!  Once the pajamas were washed and dried I sewed on 2 yellow patches of felt.  The orange footie pajamas were complete!

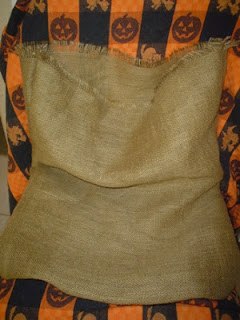
For the head of Sam we used a technique I had found on the internet HERE!  BTW, this guy did an amazing job on his costume too!  We started off with 2 yards of burlap, cut it to drape over the shell of the head then began the stitching (a long process) and finishing it off with the button eyes.  Finally after debating how to get the burlap to lay flat on the shell, we applied a spray glue to the shell and then laid the burlap over it...it worked!!! 

We used the left over burlap to create the gloves and sack. 


Lastly I created the lollipop prop, Sam's chosen weapon.  I used George and Basic Shapes Cricut cartridge to cut out 2 circles in orange cardstock.  I hand cut the black pumpkin pieces.  I attached the black pieces to the orange circles (front and back), then hand cut the bite mark in the lollipop.  I applied Glossy Accents to both pieces and let dry.  I used a wooden dowel to create the lollipop stick.  I painted it orange and wrapped black ribbon around it.  Once the lollipop pieces were dry I used 2 thickness of foam squares between the two lollipop pieces and attached them together with the stick in the middle.

My daughter was thrilled...we pulled it off!  She told us the costume head of Sam was very hot, but since we live in Arizona that is to be expected, it might not be for someone living in a cooler climate.  On Halloween we were stopped by other parents who knew who Sam was and they asked to take her picture and another person told us she was the best costume of the night!  All of our hard work paid off and the future of this costume will become a lifesize Halloween prop. 

I am entering this costume in the following challenge:
  • Haunted Design House - HDH #157 - Hammer House of Horror - You are to ctreate a dark, Gothic, or Halloween-based art piece that is a tribute to Hammer Films.  Now I know a Sam costume may not be a tribute to Hammer Films but my love of horror films came from the many Sunday afternoons as child watching those Hammer Films.  My love for horror films still lives with me today and continues to grow every year.  
Thank you for stopping by and checking out my Sam costume and I hope you enjoyed it!

Sunday, September 23, 2012

Crashed Witch card


Today I bring to you card I have be wanting to make forever...here it is my Crashed Witch card.  This was such a fun card to make...I forgot how much I loved making paper dolls.


I used these items to make this card:
  • Design Studio
  • Wild Card Cricut cartridge - door
  • Paper Doll Dress Up Cricut cartridge - the witch
  • George and Basic Shapes - round part of the witches hat
  • rafia - for the broom
  • shinny leaves
  • Martha Stewart glittler -  on the hat and boots
  • white ink - the dirty-up the hat and witches dress
  • black button - the knob of the door
  • foam squares - under her body and hat
  • foam tape - behind the door
  • misc. fall leaves clear stamp - inside
  • wooden witches hat stamp - inside
  • BugBites Stamps - All Year Round - inside


I am entering this card in the following challeges:
Thank you so much for stopping by and checking out my Crashed Witch card.

Thursday, August 30, 2012

Beware the Blood Moon card


I have been thinking about this project ever since I saw the challenge post for Macabre Monday over at Haunted Design House .  I new right off the bat I wanted to create a blood moon, inspired by the movie Red Riding Hood.  I also remembered I had great stack of paper from DCWV called The Immortal Love Stack and I knew it had a fabulous paper in it with a wolf face.  So that is how it started.


I used these items to create this card:
  • Design Studio
  • George and Basic Shapes Cricut cartridge - the moon "window"
  • Happy Hauntings Cricut cartridge - BEWARE
  • Crackle Accents - on the BEWARE
  • Glossy Accents - on the BEWARE, the moon and the wolf eyes (inside)
  • Craft paint - clouds
  • red plastic folder divider - the moon
  • DCWV The Immortal Love Stack - the wolf face paper inside the card
  • computer font - "Under the Blood Moon...a man bitten is a man cursed." Red Riding Hood
  • brown ink - inked the edges of the inside font papers
I am entering this card in the following challenges:
Thank you so much for stopping by and checking out my Beware the Blood Moon card.

Sunday, May 13, 2012

Looking through the Window - Mother's Day card


Today I bring to you a Mother's Day card I created for my mother-in-law.  During the end of December my mother-in-law had made this statement on her facebook page, "So strange!!! I was looking out my kitchen window this morning thinking about Joe (her deceased husband) when this yellow butterfly flew on my deck and hoovered in front of the window a little while then flew away...Maybe it was telling me that I will be okay and next year will be a better one for me!!!!! I hope so anyway...."  Now this might not sound strange to some of you but since she lives on the east coast, seeing a butterfly in December is very strange.  Ever since that day I knew I wanted to create a window card for her...and this is what I came up with.


I used these items to create this card:
  • Design Studio
  • Locker Talk Cricut cartridge - for the window card***I know totally not expected!!!
  • George and Basic Shapes Cricut cartridge - for the square cut for the window
  • Indie Art Cricut cartridge - the butterfly
  • Cuttlebug
  • Swiss Dots embossing folder
  • Studio G glitter glue
  • foam squares
  • Stampin' Up Ribbon and lace - for the curtain effect
  • Glue Gun - to attach the lace to the ribbon
  • Clear Craft Plastic - for the window
  •  DCWV Spring Stack of pattern paper
  • My Craft Spot stamps - Inside & Out Set #2

I am entering this card in the following challenges:
Thank you so much for stopping by and checking out my Looking Through the Window Mother's Day card!

Thursday, May 10, 2012

Altered Teacher Appreciation Reward Canister


I've had this small clear canister for months now and finally did something with it.  I created this reward canister for my daughter's 4th grade teacher as a part of his teacher appreciation gift.  I found this project to be extremely simple and will be making more of these in the future.


I used these items to create this teacher appreciation reward canister:
  • small clear canister from $1.00 bin at Target
  • DCWV Grade School printed cardstock
  • George and Basic Shapes Cricut cartridge - for the circle and star on lid
  • Locker Talk Cricut cartridge -  for the "Good Job!" saying on front
  • Red, green and yellow Stickles
  • Red ribbon
  • "You Rock" clear stamp from Bug Bites Stamps - All Year Round


I am entering this altered teacher reward canister in the following challenges:
Thank you so much for stopping by and checking out my Altered Teacher Appreciation Reward Canister!