Showing posts with label craft paint. Show all posts

Sunday, February 9, 2014

Be My "Bloody" Valentine Candy Box


I am super excited to share with you today my Be My "Bloody" Valentine Candy Box with a little surprise inside. This is for sure not your traditional box of chocolates for a traditional Valentine. Since my favorite show, "The Walking Dead" comes back on tonight I just had to pay tribute to it. So I created a triangle candy box, decorated it with a Valentine flare and some "blood splatter." Then I hit the kitchen and made some candy coated Oreo brains for the surprise inside.


I used these items to create the Candy Box (ALL of which have been in my stash for quite some time):

  • Sweet Tooth Boxes Cricut cartridge - triangle candy box cut at 9 1/4
  • Cake Basics Cricut cartridge - heart cut at 9 1 /2
  • Wild Card Cricut cartridge - Be my Valentine
  • red lace
  • red craft paint - "blood splatter"
  • Glossy Accents

I used these items to create the surprise inside (ALL of which I had on hand too):
  • Wilton Cookie Candy Mold
  • Oreo cookies
  • Wilton Candy Melts - red, pink and white
I am entering my Be My "Bloody" Valentine Candy Box in the following challenges:

Saturday, August 31, 2013

Spike - HDH #174 Macabre Monday - Nailed It!

Well it has been a very long time since I created anything. The Summer months have been extremely hot in Arizona and just cleaning the house really takes all of the energy out of me, not to mention that my craft area is in my kitchen which gets the full setting sun in the afternoon and evening. So since we have been finally getting some rain and lower temps I was able to get a project done.


Meet Spike. He is a Goth Zombie Baby, well just a baby head! A couple of months ago while at the local Savers my oldest daughter found 2 baby doll heads for just .99 cents each. We are always on the lookout for items that can be repurposed and/or created into art. With the most recent challenge over at Haunted Design House titled Nailed It! I knew that I wanted to use one of my baby doll heads for it. I also knew right off the bat I didn't want to do the well know and well loved row of nails down the middle of the head because of fear that everyone would do it. So then the idea came to me, a Goth Baby and I thought the neck was the perfect place for a spiked collar. From that point on more ideas like the nail ear ring and the lip ring came to life.


But since I like a little gore this had to be a zombie baby and I had to create the bite mark, which you can see is right on the head.


I'm surprised I actually got this done because it seemed like everything I tried was screwed up, my spray paint was clogged, I dropped the head after painting it, and the nails were too small so they didn't stay where I wanted them to go. This was a project full of compromise but I am happy with the final outcome!

I used these items to create Spike:
  • baby doll head
  • White spray paint
  • Black, gray, brown, yellow and pink craft paint
  • Fake blood
  • Glossy accents - eyes
  • Part of my daughters old belt - collar
  • Nails - collar and ear ring
  • Silver paint marker - nails in collar
  • Chain ring - lip ring
I will be entering this in the following challenge:
Thank you for stopping by and checking out my Spike hope you enjoyed him.

Sunday, June 9, 2013

Altered Composition - Hocus Pocus inspired - Spell Book with Hangman


I am super excited to bring to you today my Hocus Pocus inspired Spell Book with Hangman page saver. I've been wanting to create this for a very long time. I recently found an amazing designer,  Dave Lowe, and I have started following his blog. He creates so many different and interesting things, especially inexpensive things. I took his Old Creepy Books design and interpreted it to suit my Spell Book.


I covered the entire book with the watered down clear glue and crinkled paper towels all over it. Let it dry over night.


I painted the entire book with the blush craft paint and then brown craft paint.


I then marked the suede paper with red and brown sharpie markers, cut the suede paper, and then stitched the paper with the hemp cord. I glued the Styrofoam ball to the book. Covered the front of the book with watered down clear glue and began to lay the suede paper down. Let that dry. Then I applied some watered down brown and blush craft paint. I then attached the eye lash.


Finally I added my Hangman page saver. I did actually watch a YouTube video to create my noose around my hangman and was pleasantly surprised how easy it was...scary! I am so please with the way this project turned out and I hope you like it too!


This is what he looks like saving my page:


I will be using this "Spell Book" as a sketch book for future ideas.

I used these items to create my Spell Book:
  • Composition Book (unused from my daughter's last school year)
  • Paper towels
  • Clear glue (watered down)
  • Sponge brush
  • Suede looking pattern paper (to look like skin)
  • Brown and Blush craft paint (watered down)
  • Red and brown Sharpie markers (cut skin)
  • Hemp Cord (stitches)
  • Styrofoam ball (cut to create eye lid)
  • fake eye lash
  • Jute twine (hangman's noose)
  • Plastic skeleton (Halloween decoration)
I am entering my Hocus Pocus inspired Spell Book with Hangman page saver in the following challenge at Haunted Design House - HDH #168 - Hangman's Handiwork.

Sunday, November 4, 2012

Meet Sam


Today I give you a little Halloween treat!  My husband and I created this costume and all of the props for our oldest daughter Kaitlyn.

Sam is a character from the movie "Trick 'r Treat" and he has been deemed the Halloween Mascot.  His job is to enforce the Halloween traditions; such as dressing up in costume, giving out candy and to NEVER blow out your lit carved pumpkins before midnight on Halloween.  If you don't follow these Halloween traditions Sam will find you and kill you.  You can read more about Sam: The Spirit of Halloween here.

This project was extremely difficult.  I began looking for orange footie pajamas for my daughter months ago.  With NO luck in my search, I opted to buy white footie pajamas.  My next challenge was to dye the pajamas.  Not ever dying  a single thing my entire life, I did not know that RIT dye is not recommended for 100% polyester.  Plus I didn't relize the pajamas were 100% polyester either.  So after searching the internet I did find out that there are some tricks to using the RIT dye and dying polyester. So the first orange RIT dye we tried was too light, almost a peach color. So we tried a darker RIT dye and it worked!!!  Once the pajamas were washed and dried I sewed on 2 yellow patches of felt.  The orange footie pajamas were complete!

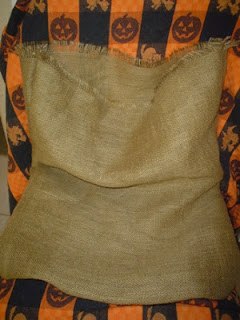
For the head of Sam we used a technique I had found on the internet HERE!  BTW, this guy did an amazing job on his costume too!  We started off with 2 yards of burlap, cut it to drape over the shell of the head then began the stitching (a long process) and finishing it off with the button eyes.  Finally after debating how to get the burlap to lay flat on the shell, we applied a spray glue to the shell and then laid the burlap over it...it worked!!! 

We used the left over burlap to create the gloves and sack. 


Lastly I created the lollipop prop, Sam's chosen weapon.  I used George and Basic Shapes Cricut cartridge to cut out 2 circles in orange cardstock.  I hand cut the black pumpkin pieces.  I attached the black pieces to the orange circles (front and back), then hand cut the bite mark in the lollipop.  I applied Glossy Accents to both pieces and let dry.  I used a wooden dowel to create the lollipop stick.  I painted it orange and wrapped black ribbon around it.  Once the lollipop pieces were dry I used 2 thickness of foam squares between the two lollipop pieces and attached them together with the stick in the middle.

My daughter was thrilled...we pulled it off!  She told us the costume head of Sam was very hot, but since we live in Arizona that is to be expected, it might not be for someone living in a cooler climate.  On Halloween we were stopped by other parents who knew who Sam was and they asked to take her picture and another person told us she was the best costume of the night!  All of our hard work paid off and the future of this costume will become a lifesize Halloween prop. 

I am entering this costume in the following challenge:
  • Haunted Design House - HDH #157 - Hammer House of Horror - You are to ctreate a dark, Gothic, or Halloween-based art piece that is a tribute to Hammer Films.  Now I know a Sam costume may not be a tribute to Hammer Films but my love of horror films came from the many Sunday afternoons as child watching those Hammer Films.  My love for horror films still lives with me today and continues to grow every year.  
Thank you for stopping by and checking out my Sam costume and I hope you enjoyed it!

Thursday, August 30, 2012

Beware the Blood Moon card


I have been thinking about this project ever since I saw the challenge post for Macabre Monday over at Haunted Design House .  I new right off the bat I wanted to create a blood moon, inspired by the movie Red Riding Hood.  I also remembered I had great stack of paper from DCWV called The Immortal Love Stack and I knew it had a fabulous paper in it with a wolf face.  So that is how it started.


I used these items to create this card:
  • Design Studio
  • George and Basic Shapes Cricut cartridge - the moon "window"
  • Happy Hauntings Cricut cartridge - BEWARE
  • Crackle Accents - on the BEWARE
  • Glossy Accents - on the BEWARE, the moon and the wolf eyes (inside)
  • Craft paint - clouds
  • red plastic folder divider - the moon
  • DCWV The Immortal Love Stack - the wolf face paper inside the card
  • computer font - "Under the Blood Moon...a man bitten is a man cursed." Red Riding Hood
  • brown ink - inked the edges of the inside font papers
I am entering this card in the following challenges:
Thank you so much for stopping by and checking out my Beware the Blood Moon card.

Thursday, July 19, 2012

Music Mayhem HDH 142 - He's Back (The Man Behind the Mask)


This week over at Haunted Design House Macabre Monday the challenge is to create a dark, Gothic, or Halloween-based art piece that uses a song or song title as your muse.  I did some research on the internet and found a song that totally inspired my creation.  I can't believe I had never heard this song, Alice Cooper's "He's Back (The Man Behind the Mask)."  I have always been a HUGE fan of The Friday the 13th films and Jason Voorhees is one of my all-time favorite slasher film killers!  That is why I was so surprised I had never heard this song, plus who doesn't love Alice Cooper!!!  If you are interested in listening to and watching the video you can check it out HERE on YouTube!

I used these items to create this card:
  • the mask image is from the internet
  • the machete is from the internet too but I didn't like the way it looked printed so I hand cut out and painted my own and applied a little Glossy Accents to the paint and handles
  • the background paper (inside and out) are from DCWV The Immortal Love stack
  • Martha Stewart edge punch
  • Design Studio
  • Happy Hauntings Cricut cartridge - Friday the 13th
  • Pooh Font Cricut cartridge - HE'S BACK!
  • (inside card) Studio G clear stamp - TREAD LIGHTLY - which I cut out and made to look like a camp sign
  • (inside card) white gel pen - for the letters of the sign
Here is the inside of the card:


Here is a close up of "the mask..." so that you can see some of the blood on the machetes:

I am entering this card in the following challenges:
I am so pleased with the way this card turned out...I think even Jason would be proud.  Thank you so much for stopping by and checking out my He's Back (The Man Behind the Mask) card.

Friday, January 13, 2012

Rock On **WARNING GRAPHIC**

Above is just a taste of what I have to offer today!

I know not the normal card I usual put out but sometimes I have to explore the darkside of me and Macabre Monday - HDH #115 - Metal Mania Challenge has inspired me yet once again.  The challenge requires you to create a dark, Gothic, or Halloween-based art piece that uses, includes, or depicts metal in some way.  You can go very literal with metal embellishments or metallic papers.  Or you can use the Metal music genre for your muse, or maybe some industrial H.R. Giger type stuff.  Plus, this card goes quite well for the Fantabulous Cricut Challenge Me Monday #93 - create a masculine project - my hubby already told me he loves it!!!


I chose Metal music, foil, staples, and brads to show off my metal.  I was also inspired by one of my all-time favorite Heavy Metal Rockers Ozzy Osbourne and the Bat incident.  I know it's hard to see but I tried to make it look like the bats head had been bitten off, but the head it quite small...I hope it reflects well in the photo!

I used these items to create this card:
  • Design Studio
  • Rock Princess Cricut cartridge - for the hand and the "Rock On"
  • Wrap It Up Cricut cartridge - for the bat
  • black Sharpie marker - for the finger nails (I didn't want the nice manicure look and I thought the marker made it look a little messy - on purpose)
  • staples - on the corners
  • brads - on the bat
  • Red craft paint
  • Firefly green Stickles - for the eyes of the bat
  • black cardstock
  • aluminum foil

I am entering this card in the following challenges:
I had been thinking about this project for days and now I can finally say I can put this one to rest!  I love everything about this card...heck I might even have to send this one to the Ozzy Fan Club! 

Thanks for looking and I hope I didn't gross any of you out too much!

Saturday, December 17, 2011

Family Christmas Project


The other day while at Michael's I picked up some of the un-finished wood and decided we would have a family craft night.  So the other night we each had a un-finished wood ornament to paint.


This is my 2 year old Jaidyn painting her ornament:


This is my 9 year old Kaitlyn painting her ornament:

More pics of the kids and my husband working on their ornaments:


This is mine before it was finished:

Here is my finished project. 

I used a really pretty ice blue and silver sparkle craft paint.  I cut the snowflake from Cricut cartrdige Wrap-it-Up at 5 3/4 and then stickled it.  Lastly I attached ribbon to the back that says, "Let it Snow."

These are my husband's and my oldest daughter Kaitlyn's projects.

They used red, green, blue, and silver sparkle craft paint.  They also added some really chunky glitter and stickle.  Kaitlyn also attached a Dilly Bean stamp - Snow Family that I printed out on cardstock and colored with Stampin' Up chalks.  Both were finished off with some red ribbon.


Now this one was made by my 2 year old daughter Jaidyn...she had a blast painting her project and loved using all the colors.  I finished it off for her by adding some bright pink ribbon.

Here they all are togther hanging from our living room window.
I am entering our projects in Getting Cricky - Simply Sunday Challenge - create a holiday decoration

Thanks for stopping by.  I hope you enjoyed our family Christmas projects. 
Hope you have a very Merry Christmas!!!

Saturday, October 8, 2011

HDH #109 - Inner Workings

I created this 3D coffin to enter into the challenge over at Haunted Design House - HDH #109 Macabre Monday - Inner Workings.  The challenge was to create a dark, Gothic, or Halloween-based art piece that either is quite literal (clock works or guts) or just simply decorate the inside of your project as well as the outside.  I personally will NEVER be buried out of my fear of bugs...I HATE ALL THINGS CREEPY CRAWLY!!! 

Here's a look at what's inside:


The "inside" of my coffin represents the "inner-workings" of the coffin and what happens to the body after a long period of time.

Here's a close up...I just love that little skeleton!


I used these items to create this 3D coffin:
  • Design Studio
  • Life's a Party Cricut cartridge - 3D coffin (measuring 7 1/2 inches in length) and the inside of card feature
  • Indie Art Cricut cartridge - for the cross on the top of the coffin
  • plastic skeleton from a Halloween garland
  • Red fabric from an old costume and polyfil for the bed of the coffin
  • Martha Stewart crushed red flock for the inside, top of coffin and red craft paint
Thanks for looking!  I hope you enjoyed my little project!