Tuesday, August 30, 2011

Just 4 You Snake Birthday card

I'm totally lovin' my Design Studio, it makes making cards so much easier when trying to decide what size to cut everything plus you can make 1 single cut just by placing all of your paper on one mat!!!  I created this card too in the Design Studio for Cricut Cardz Challenge #89 was to make a child’s birthday card using something you’d see in a jungle…monkey, lion, tiger, giraffe, zebra, hippo, etc, and any cartridges or colors you’d like.  I choose a snake because it is probably the one creature I'd like NOT to see in the jungle but most likely would!!!


I used these items to create this card:
Design Studio
Create a Critter Cricut cartridge for all my cuts
Cuttlebug with the Traffic Jam embossing folder
Stickles
Martha Stewart punch
White gel pen
Twine
Google Eyes
Pop Dots
My Craft Spot stamp for the inside


Thanks for looking, hope you enjoy the rest of your day!

Sunday, August 28, 2011

Trying a new look for my blog

I thought since I've been creating some Halloween type projects these days and with Halloween getting closer, I'd try a more festive look.  I'm pretty happy with it right now.  I appreciate any comments or suggestions.

Saturday, August 27, 2011

Framed Spooky Clown - HDH 103 Carnival of Curiosities


When I first found out that the theme for Macabre Monday was HDH103 Carnival of Curiosities over at Haunted Design House I just knew I wanted to do something with a creepy clown.  Plus, over at Bitten by the Bug2 they are having a Happy Hauntings challenge and you are to create a project using a frame from that Cricut cartridge.  I had the idea to create a card using the skeleton frame to represent a mirror (you know like the ones you'd see at a creepy carnival attraction) and of course the creepy clown.  His face is translucent, almost ghost like and then you can see just a very slight dark image behind that face, it's a scull....SPOOOOOOKY!!!
I created this card in Design Studio. 

I used these Cricut cartridges:
Happy Hauntings for the inside scull and frame, welded and cut at 8 1/4.  I also have 3 layers on the front of the frame.
Wrap it Up for the clown
Paper Doll Dress Up for the bow

I attached a tinsel like fuzzy ball to the top of the clown's hat and outlined his face with a white gel pen.  I flocked the clown's nose with Martha Stewart flock.  I used a clear stamp on the inside that just says, "SPOOKY." 

I am so pleased with the way this turned out...totally creepy...the exact look I was going for!!!  I hope you like it too and thanks for stopping by!

Wednesday, August 24, 2011

I'm a Gruesome Twosome!!!!


I was named one of the Gruesome Twosomes over at Haunted Design House for my Frightfully Delightful - Queen of the Damned card.  I'm so excited!!!  The creative juices have been in over-drive and I am loving it!!!  I'm so glad others have also noticed my creations and can appreciate them.  Every little bit of encouragement helps me to continue to keep pushing myself...so I thank you all for that!

Kaitlyn - Kindergarten Layout


I did it again, I missed another challenge just by minutes this time.  Jaidyn (my 21 month old) wouldn't go down tonight like she normally does so I had to sit in her room for almost 15 minutes before she would go to sleep.  Who cares though, I'm just happy that I was able to finish my 1st school scrapbook page for Kaitlyn (who is now in 4th grade).  I kept this page very clean and simple.  I used the Design Studio to create the title using only the Plantin SchoolBook Cricut cartridge.  I matted the picture and the title in red cardstock and I used a Martha Stewart punch to give it a lace effect (to represent the lace on Kaitlyn's outfit).  I also adhered the actual barrettes that Kaitlyn wore in the picture.  I know someday this page will mean so much to her as it does to me already.

Sunday, August 21, 2011

Frightfully Delightful - Queen of the Damned *** WARNING *** This is a little twisted!

I created this card for HDH102 Queen of the Damned challenge, which requires a focus on royalty, crowns, and/or thrones and with a little creeptastic touch, over at Haunted Design House I made everything in Design Studio.  I used these Cricut cartridges:  Storybook for the swirly corners and the sign, Birthday Cakes for the queen, and Paper Doll Dress Up for the head and sword.  I used a stamp from BugBites - All Year Round stamp set  and some gem brads for the sign.  I used Martha Stewart glitter on the crown and just some craft paint for the blood.  I am so pleased with the way this turned out...totally what I was going for.  I know this kind of stuff isn't for everyone but this is just another side of me and with Halloween lurking around the corner I just couldn't resist being a little twisted for a change!

Here is the full-size 5 1/2 x 8 1/2 card...I hope you like it!
And a little bit more up close and personal with our queen.

Thanks for looking and I hope this doesn't make you think any differently of me!


Wednesday, August 17, 2011

Western Boot card

Howdy there gals!  Just wanted to share my latest creation.  I am entering this western boot card in the Cricut 360 Challenge #7 Old West.
I created this entire card in Design Studio, using only "Just Because" Cards Cricut cartridge.  I added star brads for some additional flare. 

I added the phrase "Just Kickin' Back" to the inside and some doodling around the edge.

Thanks for looking!

Tuesday, August 16, 2011

Hey Pumpkin Pie card

Well, I'm kinda bummed...I originally was going to enter this card in Bitten By the Bug Pie Challenge-Paper Dolls Dress Up but I missed it so I have decided to enter it in the Fantabulous Cricut Challenge #73 - Piece of Cake! Create a project with a cupcake (or another baked good) .

Here are the details about this card:

I used Paper Doll Dress Up Cricut cartridge for the pie cut 3 times at 1 3/4 Real Dial size and then hand cut the pieces to make a pumpkin pie.
I used A Child's Year Cricut cartridge for the pumpkin cut at 2 1/2
I inked all the edges with Color Box inkpad
I stamped the pumpkin with a stamp I found in the dollar bin at Michael's.  I drew in the lines on the pumpkin, colored in the lettering with a LePlum maker, and stickled the small pumpkin
I used brads and twine for some decorative touches.


On the inside I used a stamp from My Craft Spot
Thanks for looking!!!

Friday, August 12, 2011

Happy Birthday Caterpillar card

Good evening everyone!  I am sharing with you today a card I created for my husband's birthday which is next Friday!  I am also entering this card in 3 challenges this week:  Challenge #21 - Birthday Cards at Birthday Sundaes - Challenge Me Monday # 72 at Fantabulous Cricut and My Pinkalicious Blog Hop (August 2011) 

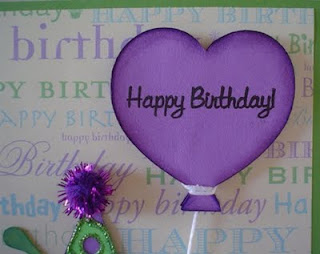
I only used the Create a Critter Cricut cartridge (one of my favs) and created all of the cuts in the Design Studio.  I used a Cuttlebug embossing folder on just the body of the caterpillar to give it a wrinkly effect.  I stickled around the pinwheel and hat.  I attached the pinwheel with a brad and adhered a tinsel type fuzzy ball to the top of the hat.  The heart balloon is puffed up and layered.  I used stamps from My Craft Spot for the the balloon and the inside of the card (see below).  BTW...I LOVE THEIR STAMPS!!!  I attached the the balloon to the caterpillar with some white floss.  On the inside of the card I used a Martha Stewart corner punch.

Thanks for looking and have a great day!