Wednesday, November 30, 2011

I'm a TOP WINNER @ FCCB

Fantabulous Cricut
 
I'm so excited!!!  I had this idea in my head for over a year and now it is a reality, plus I was chosen a TOP  5 WINNER @ FCCB for my
 
This was such a fun family project for my oldest daughter and I.  I look forward to next Thanksgiving and reading all that our family was thankful for throughout the coming year!

Friday, November 25, 2011

Give Thanks Basket

A new Thanksgiving traditional was started this year.  I wanted to do this last year but never got around to doing it but with the help of my 9 year old daughter Kaitlyn we finally did it!  I read somewhere about this project years ago and this is our "Give Thanks Basket."  Basically the basket is where you keep strips of whatever color paper you'd like (I choose red, green and white) and throughout the year you write on a strip of paper something you are thankful for.  Then next Thanksgiving you bring out the basket and read what your family has written on them throughout the year.  Lastly, you make a chain-link garland out of the written on strips of paper and use for your Christmas decorations on your tree or wherever you'd like.

I used these items to create my Give Thanks Basket (ALL of these items I had in my stash):
  • basket (just one I had at my house)
  • leaves (from a Fall garland that had fallen off) - hot glued to the outside of the basket
  • wooden dowels -  for the sign
  • jute packaging twine - for the sign
  • Create-a-Critter Cricut cartridge - for the turkey
  • Sesame Street Seasons Cricut cartridge - for the leaves
  • Storybook Cricut cartridge - for the font
  • Studio G glitter glue
I am entering this project in the following challenges:
Here is our Give Thanks Basket during our Thanksgiving dinner:

Thanks for stopping by and viewing my Give Thanks Basket.  I hope everyone had a wonderful Thanksgiving and now let's bring on Christmas!!!

Wednesday, November 23, 2011

Kaitlyn's Elmo Birthday card for Jaidyn

Kaitlyn is my 9 year old daughter and this is her card she made for her sister Jaidyn's 2nd birthday.  She designed it based on the crayon box in the Elmo's Party Cricut cartridge.

Kaitlyn is entering this card in Craft Your Passion Kids Crafts Challenge #2 - seeing red - create a project with red on it.

Here's a close up of the bottom:
Here's the inside:


I know Jaidyn won't understand it until she's much older, but there was alot of time and love put into this card and we are so proud of Kaitlyn for doing it!!!

Tuesday, November 22, 2011

Thanksgiving Napkin Holder and Place Card

I finally did it...a Thanksgiving project and in less than a day.  I made 6 of these napkin holders and place cards for our Thanksgiving table.

I used these items to create these:
  • Design Studio
  • Create a Critter Cricut cartridge -for the turkey
  • Songbird Cricut cartridge - for the names
  • Misc. Thanksgiving stamps
  • BugBites - All Year Round stamps (Give Thanks and Happy Turkey Day)
  • Orange and Brown stamp pads
  • Studio G glitter glue (around the turkey's hat)
Here's a close up of the napkin holder and place card:


I am entering this project in these challenges:
I am so happy with the way these turned out.  My original idea was to have the napkin holder and place card connected but they look great seperate.

Thanks for checking out my napkin holder and place card...have a safe and Happy Thanksgiving!!!

Elmo's Party Game

I made this game for my daughter Jaidyn's 2nd birthday party.   I'm unsure of it's measurements but the base is half of a piece of foam board, then I cut everything out using the Design Studio and the Elmo's Party Cricut cartridge.  This was super fun to make and is nice to have something a little different than the usual "Pin the tail on the Donkey."  I wrote the players names on the game pieces (crayons).  The object of the game is to give Elmo his crayon and the prize for getting the closest was a box of brand new crayons!

I am entering this project in the Decorate To Celebrate Challenge #12 - create any project to be used as a party decoration (or party supply) for a SURPRISE BIRTHDAY PARTY!!  Let's celebrate EVERYTHING WONDERFUL ABOUT GETTING OLDER (tee hee) with your table decorations, party banners, pennants, yard signs, cupcakes, party favors and more!!  

Sunday, November 20, 2011

Elmo Birthday (easel) card for Jaidyn

Today is my daughter Jaidyn's 2nd birthday party and this is the card I made for her.  My original design had Elmo holding the balloons in the other hand and the balloons were above the top of the card.  But using stickles on them made them too heavy and they just would fall over so I had to re-design my idea.  I think this way looks cute too!  I decided to do an easel card because so far that is my favorite style of card to make but I still have lots more to discover!

Here's a close up of just Elmo:
And here is a close up of the Happy Birthday:

I used these items to create my Elmo easel card:
  • Design Studio
  • Elmo's Party Cricut cartridge - for Elmo and crayons
  • Birthday Cakes Cricut cartridge - for the Happy Birthday
  • Recollections pattern paper from my stash
  • Cardstock from my stash 
  • Martha Stewart flocking powder
  • Red and Yellow stickles
  • foam squares
  • black pen
I am entering this card in this challenge:
Thanks for stopping by and I hope you enjoyed my Elmo Birthday (easel) card for my NOW 2 year old daughter!!!  I will be posting pics of the party later tonight, if all goes well!

Wednesday, November 16, 2011

Kaitlyn's School Turkey Project

November 2008 Kaitlyn, being in 1st grade at the time, had a project that the entire family had to help her make.  She came home from school with just the base of the turkey and she was instructed to be creative and this is what we came up with. 

We took apart a pine cone and glued all of the pieces to the base and spray painted it gold.  While we waited for it to dry, my husband shaped pipe cleaners, some into the back tail feathers and the others into feet for the turkey.  I cut out the hat and the blurb on my Cricut.  I stamped the blurb with a Happy Thanksgiving stamp and attached some shiny leaves to the blurb.  I also used a gold pen to doodle on the hat and color in the band around the hat.  Once the body was dry we attached the tail and legs, hat, google eye, eye lash (left over from Halloween), fancy fur yarn, and Kaitlyn drew the details on the face of the Turkey.  Done!  I think it turned out so cute. 

Here's a close up of the face and blurb:


This is Kaitlyn with her turkey at school:
Today I finally put this treasure in a shadow box to be a perminant decoration for Thanksgiving.  I love the way it looks in the frame and with the other Fall decorations:

I hope you enjoyed viewing our little family Thanksgiving project and have a safe and Happy Thanksgiving!

Sunday, November 13, 2011

I'm a WINNER @ Decorate To Celebrate!

I am so honored to be chosen 1st place winner at Decorate To Celebrate  for my Elmo Invitations and the wonderful Rhonda  from Scrap Happens with Rhonda made me this fabulous Elmo mini album!!!
Here's the inside:

The Decorate To Celebrate Challenge is still going on all month long and it is open to ANY project (yes, this means you can enter a card or a layout too!!)...  Because of this, they are LIMITING the number of entries to a MAXIMUM of THREE -- you can enter up to THREE projects this month!!!  This is so exciting and so much fun!  I hope you too will join in on the fun!

Thanks again to Rhonda and Decorate to Celebrate!  I can't wait to see this Elmo mini album in person!

Thursday, November 10, 2011

Elmo Altered Composition Book

My youngest daughter is turning 2 this month and as one of her gifts I made was an altered composition book.  I plan on using this book to teach her her letters and numbers.  Jaidyn absolutely loves Elmo, her party is going to be Elmo, and I already know she will be getting lots of Elmo gifts.  I had the idea for this composition book months ago and have now had the opportunity to make it.

I am also going to be entering this in these challenges:
  • Fantabulous Cricut - Challenge Me Monday #85 - Book Lover - Create a project that has something to do with a book. You can make your own book, include the image of a book on your project, design a bookmark, etc.
  • Shopping Our Stash Challenge #25 - stickers, rub-ons, and chipboard - sort thru your stash and dig out those forgotten stickers, rub-ons, and chipboard!  Use any one or more on your project!
  • Throwback Thursday Challenge - Kid Friendly -*** This challenge is to use a "Kid Friendly" cartridge, such as any "Disney", "Create a Critter", "Nursery Tales", "A Child's Year" etc.......
I used these items to create this altered composition book:
  • Composition book that I've had since July
  • Design Studio
  • Cricut cartridge Sesame Street and Friends - for the Elmo
  • Cricut cartridge George and Basic Shapes -  for the yellow border
  •  Martha Stewart flocking powder - that I've had since Michael's clearanced them out 
  • Elmo stickers that I bought months ago knowing that I was having an Elmo party for my daughter
  • Recollections pattern paper (Bright Lights Big City) that I bought months ago for the purpose of making Elmo invitations, scrapbook pages and whatever else I could think of
Here's an up close look at that adorable little guy we call Elmo:

It's hard to see the flocking but it really does make a HUGE difference than just using paper!  I put the #2 on the book that Elmo is reading because Jaidyn is turning 2!

I hope you enjoyed my Elmo Altered Composition Book and I plan to bring you more Elmo in the very near future!

Tuesday, November 8, 2011

It's an Elmo Party Part 3 - Invitations

I finally finished Jaidyn's invitations for her 2nd Birthday Party this month!!!  You would not believe how many issues I had trying to create these, but now that they are finished I am so pleased with the outcome.

I am entering this project in Decorate to Celebrate Challenge #12 - Surprise its a Birthday - you are to create any project to be used as a party decoration (or party supply) for a SURPRISE BIRTHDAY PARTY!!  Let's celebrate EVERYTHING WONDERFUL ABOUT GETTING OLDER (tee hee) with your table decorations, party banners, pennants, yard signs, cupcakes, party favors and more!!  :)

This design was my original design but in order for me to do this I had to have the Cricut cartridge Street Sign Solutions, which I didn't have.  I looked through every cart I have (over 60 carts) and didn't have anything that came even close to looking like the Street Sign font.  I found the cart at the Cricut website and they just happened to have a sale going on, so I bought it and basically saved on  the shipping cost!!!  Once I had the cartridge I was able to start creating.


This is what I used to create this invitation:
  • Design Studio - mainly for the street sign to say,"2 Jaidyn's Party" but everything was cut using the Design Studio
  • Cricut cartridge Elmo's Party - card cut at 5 1/2, "You're Invited", Elmo face, Pop-up elmo (inside) and the #2 (inside)
  • Cricut cartridge Sesame Street Friends - street sign
  • Cricut cartridge Street Sign Solutions - used the font to create the,"2 Jaidyn's Party"
  • Cricut cartridge George and Basic Shapes - to cut out the pattern paper at 5.1
  • Recollections RSVP stamp set - stamp (inside)
  • Martha Stewart flocking powder - ladybug
Here's a couple close ups of the front of the invitation:

Now the inside:


I just love the way Elmo pops up...he is just so adorable.  I was so lucky to have found the perfect size stamp for the party info.  It was alot of work but totally worth it. 

On the 1st day my Design Studio wasn't working for what ever reason I have no idea.  I spent like an hour just trying to get things to cut out.  Then it was just a matter of getting everything on the page the way I want to cut it.  Plus I had to size things just perfectly on the sign for it all to fit.  Then it was a matter of putting everything together.  At one point in the day I walked away from my workspace (aka the kitchen) and Jaidyn decided to rip the tape on my Advanced Tape Glidder...I just about lost it, she got sent to the corner and I needed to walk away and count to 10.  I have had issues in the past when trying to re-load the tape and spent an hour one day doing so.  I was lucky it only took one try this time!  My goal was to have this finished Sunday night and in the mail Monday well, now it is Tuesday and they will hit the mail Wednesday!  I will be one of those people late to my own memorial (I plan to have it written in my well that my ashes arrive 15 minutes late).  People who know me will totally get that!  So I worked late Sunday, all day Monday and then finished this afternoon.  Oh, and the BIG KICKER, when I went into my Design Studio this morning I couldn't pull up the file for the invitation...it said,"Cricut Design Studio cannot read that file. The file may be corrupt or empty. The error that Windows returned was: Unable to read beyond the end of the stream."  I immediately bawled my eyes out for like 20 minutes...the hours and time I spent on these invitations just went down the crapper and I wasn't even finished yet.  I still have yet to recover the project but I'm hoping someone on the Cricut message board will be to help me out!

So that's my story...sorry for it being so lengthy but it was a very challenging project and I hope that someday I'll be able to look back at this and laugh a little!

Thanks for checking out my Elmo Invitaion for Jaidyn's 2nd Birthday...have a great day!

Halloween Pic of My Girls!!!

I just wanted to share a pic of my girls from Halloween.  My oldest daughter Kaitlyn was Claudeen Wolf from the Monster High girls and Jaidyn, my youngest, was a Cute Little Spider.  They looked so cute and I just love all the purple (my favorite color)!

Saturday, November 5, 2011

Me...Master of Macabre for August!!!

I am so proud to say that  Haunted Design House named me as their August Master of Macabre!!!  I'm so excited and I can't tell you how much I have enjoyed participating in their weekly challenges.  I may not have been able to particpate in all of them since I found their blog but I did try most weeks.  Their challenges are a little twisted but I like that, plus it made me think outside the box and that is always good to the get the creative juices flowing!  Thank you so much HDH and look forward to many more challenges in the future! 

Thursday, November 3, 2011

Halloween at my House - HDH113 - Heinously Haunted Houses


I just wanted to share my Heinously Haunted House.  I think we try to do creepy outside and cute inside.

This poor guy became victim to the giant spider that lives above our garage.  At night we have a green spot light shining on him!

This is the creepy spider fence my husband made a couple of years ago.  The spider bodies light up red in the evening.


As you walk up to the house you are greeted by our cute little ghost...my almost 2 year old daughter Jaidyn aka Cute Little Spider just happened to be next to the ghost when I took the picture on Halloween night.  They look so cute togther!!!
Then next to the side walk is the graveyard.  My husband made all of the gravestones and the one gravestone you are looking at reads,"Here Lies the Body of John Blake He Stepped on the Gas Instead of the Break."  Then of course you see the foot and leg sticking out of the ground to compliment the gravestone.

Now this guy is literally coming out of the grave.  He is just an upper half of a body and came with a spinner to hang but we decided he would look a lot creepier if he looked like he was coming out of a grave.  My husband also put a green light under him and it looked really cool! 
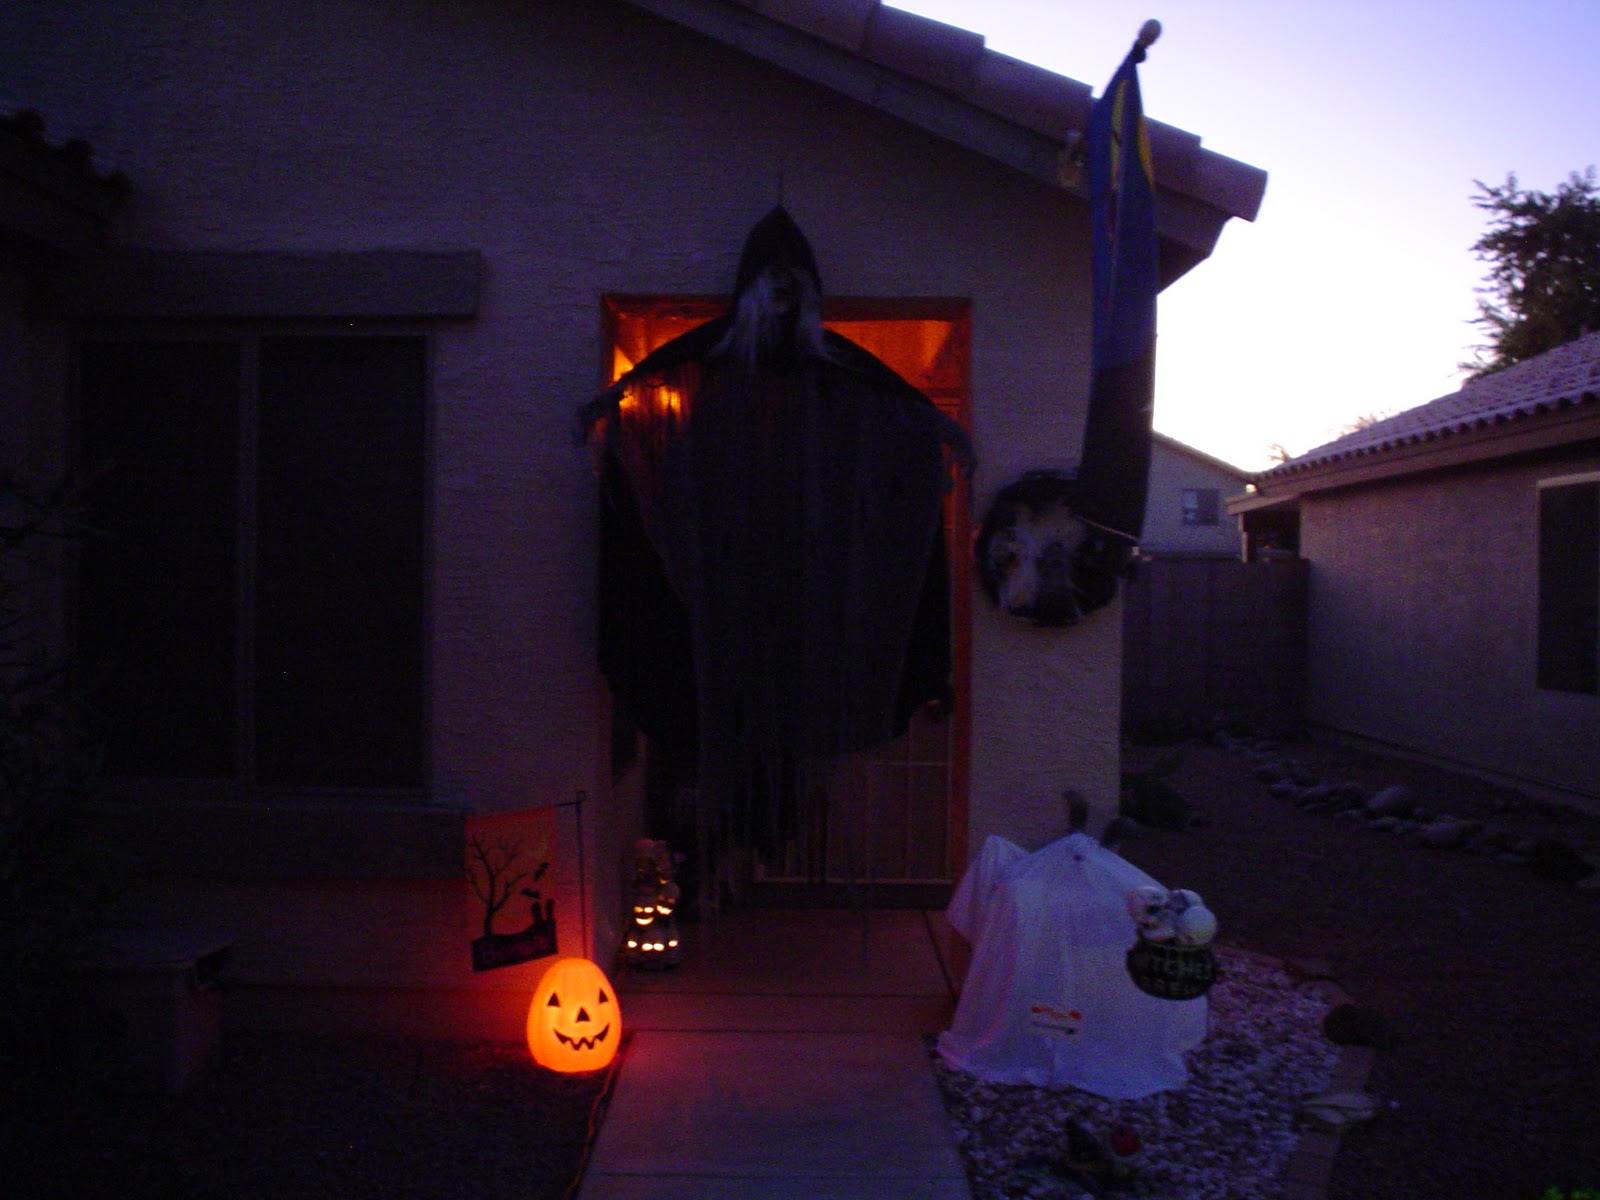
This is the graveyard watcher, he watches over all of the victims and is hanging right at our entryway...you literally have to move him to ring the doorbell. 
Here is a close up look at the wreath I made a couple of years ago hanging beside the graveyard watcher.
This is our cute little dog greeter dressed up as a ghost...a costume I made from an old bedsheet.  He stands next to the witches culdron, you might recognize it from my appalling apothecary...it has made its way outside.  Unfortunately one of the wicked witches isn't going to make it, she is melting!!!

Here's a few pictures of what my house looked like Halloween night with the lights glowing and fog flowing:

That last picture doesn't even come close to expressing the feeling of what it actually looked like but you get the idea.  I'm also not sure but can you see the little orbs floating around...ghosts maybe?
We also made these outdoor decorations a couple of years ago but some vandals destroyed them...see the before and after pictures:

Hangman Before:
Hangman After:
Witch Before:

Witch After...plus they stole the culdron:

We didn't decorate or give out candy for 2 years...it was heartbreaking to have something like that happen.  Not only did it break our hearts but it scared our daughter, who at the time was 6 years old.

Enough depressing stuff...now here is the inside decorations:

I made this wreath of witches a couple of years ago.
Here are the picture frames that I have made throughout the years and of course the newest addition Here Lies Bride Frame that I made this year.


Here are my Halloween trees...you'll probably notice some pieces that came from my Appalling Apothecary such as the ogre eyes,  the shrunken sculls from Scandinavia, and the tiny hands of munchkins.  I also added some witches fingers and some skeletons I had leftover from some empty coffins that displayed the inner workings of a coffin.


Now here are my girls, Kaitlyn and Jaidyn, carving pumpkins:


Thank you so much if you made this far.  I plan to share some pics of the girls from Halloween but for now I hope you enjoyed viewing my Heinously Haunted House and hope everyone had a safe and Happy Halloween!!!

I am entering this post in the HDH #113 Heinously Haunted Houses challenge.